If you are like me, nothing excites you more than the start of a new fall season.
From the cooler sweater-weather to the pumpkin-scented candles and lotions, the fall season is my favorite time of the year.
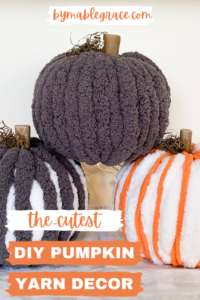
I don’t know about you, but on September 22nd, the day fall began, I immediately filled and decorated my room with warm-toned fairy lights, pumpkin spice candles, and of course these super cute pumpkin yarn decor pieces.
What I love about this craft is that it is so incredibly easy to make, is very affordable, and you end up with the absolute cutest fall decor to display in your room and/or (if you wish) all throughout your house.
There are endless possibilities, from what color yarn you choose to incorporate in this fun craft, to how many of these pumpkins you end up making.
Nothing is better than to start a new fall season with an easy DIY to get you in the fall spirit.
So, without further ado let’s get started!
(ad)
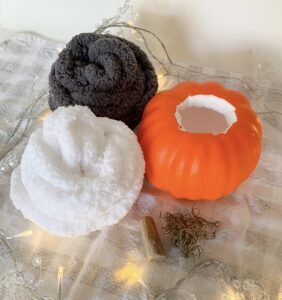
What You Will Need for This Craft:
This DIY is super easy to make and does not require any stitching, sewing, or use of a hot glue gun, which makes it the perfect family and kid-friendly craft to kick off the season with. However, this craft does include minimal use of scissors to carve the styrofoam pumpkins. 🙂
- Chunky yarn: This is a thick yarn that appears to be almost furry which will give you the best-looking pumpkin decor (in my opinion).
- Styrofoam pumpkins: Easily carvable and the perfect size
- Wooden pumpkin stems: A finishing touch
- Pumpkin vines: Another finishing touch
- Scissors: Used to carve out a hole on the top and bottom of the pumpkin
How To Make DIY Pumpkin Yarn Decor:
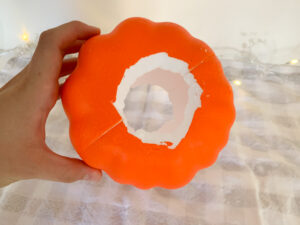
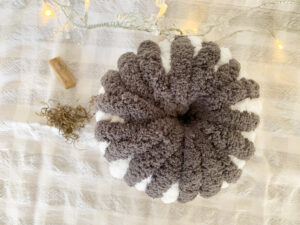
To make the pumpkins start by carving a medium-size hole both on the top and bottom of the pumpkin (as seen in the picture) using scissors, or if preferred a knife.
Once you have done that, using your eternal bliss yarn, you are going to hold one end piece of your yarn at the top of the styrofoam pumpkin holding it in place.
(picture)
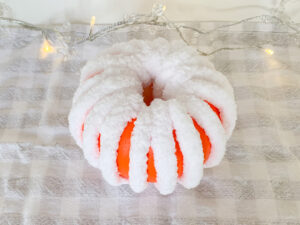
Then start to wrap the yarn around the outside of the pumpkin like so, keeping all the yarn on the outside of the pumpkin and making small loops that once done will hold itself in the pumpkin.
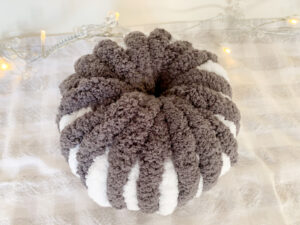
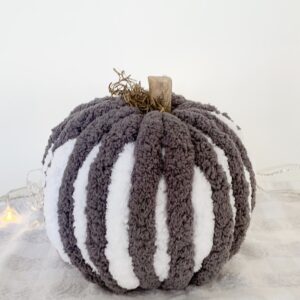
Note: If you would like two different color yarns to make a striped pumpkin, simply leave small spaces in between weaving your first round of yarn into the pumpkin.
But, if you would like to keep the pumpkin one solid color, after you wrap the yarn along the crevices of the styrofoam pumpkin, fill in the gaps with the same yarn instead of a different color.
This part may seem tricky at first, but you will get the hang of it. Just make sure that your hands are securing the yarn in place so it does not fall. You got this!
(picture)
Once you have finished wrapping all the yarn around the pumpkin, if you still have a surplus of yarn, cut it so you can tuck the other end into the opposite carved hole of the pumpkin.
Yay, the hardest part is done.
For the finishing touches add one stem to the top of your pumpkin, slightly pushing it into the top hole of the pumpkin to keep it and the yarn in place.
Lastly, add as little or as many vines to your pumpkin as you would like. Again, pushing a little part of the vines into the same hole as the stem (securing it).
Woohoo! Now that you have finished, you can repeat the process (if you would like) to create more adorable pumpkin decorations or you can call it a day, whichever works. 🙂
I hope you enjoyed this easy and fast DIY, which will certainly put you in the fall spirit.
