13 Insanely Good DIY Christmas Decor Ideas That Will Make Your Home Look Straight Out of a Holiday Movie
Want to know how to make the cutest DIY Christmas decor? Here are 13 easy-to-copy DIY Christmas Decor ideas that everyone swears by (and they’re shockingly easy).

There is no better feeling than breaking out the holiday decor and making your home feel festive. What’s even better is breaking out your craft skills and making a few decorations of your own.
Of course Amazon and Target always have super cute holiday decor, but working in a couple of pieces that you make yourself feel so much more special.
It’s also a great activity to do with friends and family to get everyone involved!
And coming from someone who has tried a few of these DIYs myself (I would not call myself particularly good at crafts 😂), you do not have to be super artsy for these DIYs to turn out well.
Below, you’ll find the cutest DIY Christmas decor ideas with photos of the finished product (always helpful to have a good visual), a simple set of instructions to follow, and all of the materials you’ll need listed out.
I’m trying to make this as easy as possible for you, so it doesn’t seem too daunting. 😉
You’re going to learn about the cutest DIY Christmas decor ideas from DIY Christmas decor ideas for the home, DIY Christmas decor ideas crafts, DIY Christmas decor ideas easy, and more.
Trust me, once you try one of these DIYs, you’re going to want to do more. The finished product always turns out better than you think.
So choose your favorite DIY (or two), round up some friends and family to help you, maybe turn on some Christmas music to set the mood, and enjoy the process! This is a great way to start off the holiday season!
This post is all about the best DIY Christmas decor ideas that will make your home feel like a winter wonderland.
The Best DIY Christmas Decor Ideas:
1. DIY Yarn Christmas Tree Wall Art
Copy this DIY Christmas decor idea:


Materials You’ll Need
- Blank wooden frames (with backing, no glass needed)
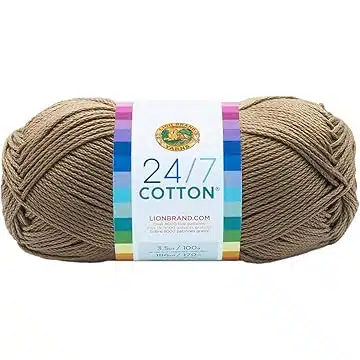
- Yarn in your chosen colors: Green, cream, tan, brown, etc.
- Scissors
- Hot glue gun + glue sticks
- Small twig or cinnamon stick (optional, for tree trunks)
- White canvas, cardstock, or fabric for the background
- Pencil (for lightly marking your tree outline)
Step-by-Step Instructions
1. Prepare Your Frame
- Remove the glass (you won’t need it).
- Cut and place a piece of canvas, fabric, or thick white paper inside as the background.
- Secure it tightly so the surface is smooth.
2. Create the Yarn Tree Strands
- You’ll be making bundles of yarn that look like soft, fringe-style branches.
- Wrap yarn around your hand or a small piece of cardboard 10–20 times.
- Slide the bundle off and cut through one end so you have even strands.
- Repeat this until you have a good pile of yarn pieces.
Pro Tip: Use longer strands for the bottom layers and slightly shorter cuts for upper layers to form a triangle shape more easily.
3. Lightly Sketch a Triangle
- Use a pencil to draw a simple outline of a Christmas tree on the background. This helps with placement but will not be visible when finished.
4. Start Gluing Your Branches
Working from the bottom up:
- Add a line of hot glue along the bottom of your triangle.
- Lay yarn strands horizontally across the glue.
- Press gently so they secure.
- Continue layering upward, slightly overlapping each row so they look fluffy and full.
Pro Tip: Angle a few pieces on the sides to round out the edges and keep the tree shape natural.
5. Add the Tree Trunk
- Glue a small twig or cinnamon stick at the bottom center.
(You can also glue a few brown yarn pieces if you prefer.)
6. Trim Into a Tree Shape
- Once the glue has cooled:
- Use sharp scissors to trim the edges into a clean triangular shape.
- Keep the top narrower and the bottom wider.
- Fluff the strands with your fingers to add texture.
7. Close Up the Frame
- Place everything back in the wooden frame (still no glass—you want texture!).
Make sure it sits snugly so the yarn stays fluffy and dimensional.
2. DIY Cake Stand Christmas Village
Copy this DIY Christmas decor idea:


Materials You’ll Need
- Wooden cake stand
Glass cloche (fits over your cake stand)
Mini wooden house or gingerbread-style house
Mini bottle brush trees (neutral colors like cream, tan, or brown)
Small wooden figurines (snowman, trees, little houses—optional)
Faux snow (Epsom salt works too!)
Hot glue gun (optional—only if you want items secured)
Ribbon for bow on top
Small LED tealight (optional to give the house a warm glow)
Step-by-Step Instructions
1. Prep the Cake Stand
- Make sure the surface is clean and dry.
No glue is necessary unless you want it to be permanent.
2. Add Your Faux Snow Base
- Sprinkle a thin, even layer of faux snow or Epsom salt onto the cake stand.
Pro Tip: Don’t add too much—just enough to cover the bottom without blocking the edge where the cloche will sit.
3. Place Your House
- Set your mini house slightly off-center so you have room for trees and a snowman.
- Optional: Place a small LED tealight inside or behind the house for a cozy glow.
4. Arrange Your Trees
- Add bottle brush trees of varying heights around the house.
- Aim for a natural, staggered look: Tall tree behind or beside the house, medium tree opposite side, tiny tree or mini house cluster toward the front, etc
5. Add Small Figures
- Place a wooden snowman or little wooden pieces in front to create a “village moment.”
Pro Tip: You can gently poke them into the faux snow so they stand upright.
6. Optional: Secure With Hot Glue
- If you want everything to stay perfectly in place: Add a tiny dab of hot glue under each piece before placing it and press gently for 2–3 seconds
7. Place the Cloche
- Carefully lower the glass cloche over your scene.
- Try lowering it at a slight angle to avoid blowing the snow around.
8. Add the Ribbon Bow
- Tie a wide, neutral-colored ribbon (linen, cream velvet, or satin) around the knob at the top of the cloche.
- Make a soft, floppy bow for a cozy farmhouse feel.
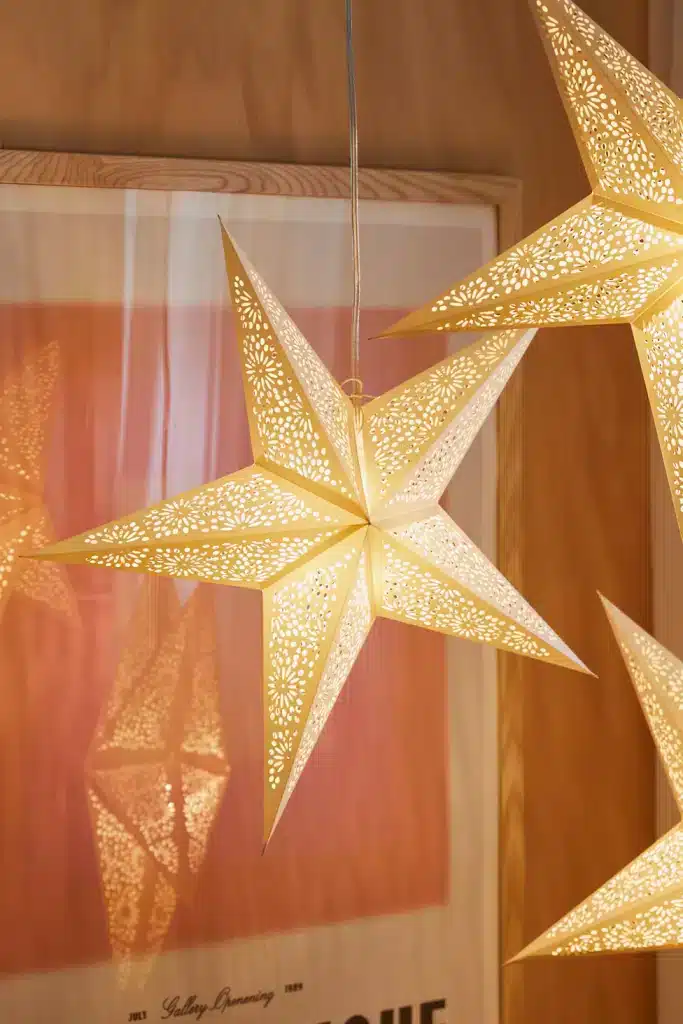
3. DIY Light-Up Paper Star Lanterns
Copy this DIY Christmas decor idea:


Materials You’ll Need
- Thick paper or light cardstock (plain or patterned)
- Scissors
- Glue stick or double-sided tape
- Hole punch (regular or mini decorative)
- String or thin wire
- LED string lights or a single LED bulb (battery-powered is easiest)
- Ruler & pencil
Step-by-Step Instructions
1. Cut Out 5 Star “Arms”
- You’ll need 5 long diamond-shaped pieces.
- Each diamond shape:
- About 12–15 inches long
- About 4–5 inches wide at the center
- To make one:
- Draw a long diamond on your paper using a ruler.
- Cut it out.
- Use the first one as a template for the other four.
Pro Tip: If you want a big star like the photo, make the diamonds longer!
2. Fold Each Diamond
- Each diamond becomes a 3-D point.
- Fold it in half lengthwise.
- Open it and fold each long side toward that center crease.
- It should look like a skinny kite shape with gusset folds.
- These folds help the star pop into shape.
3. Create the Cut-Out Pattern
- To get the glowing dot pattern:
- Use a hole punch to make holes along the surface.
- Random clusters look great — like tiny snowflakes
- You can mix hole sizes if you want extra effect.
4. Glue the Points Together
- Now assemble the star:
- Apply glue or double-sided tape along the long edge of each point.
- Attach the points edge to edge, one by one.
- Leave one edge unglued so you can open the star slightly (That gap is where the lights will go).
5. Insert the Light Source
- You have two options:
- Option A — Single LED Bulb
- Use a small LED bulb with a wire cord.
- Insert it into the center gap.
- Close the final edge with a paperclip so you can open later.
- Option B — LED String Lights
- Insert a small bundle of fairy lights inside.
- Let the battery box hang in back or rest on a shelf.
- Important: Only use cool-touch LEDs — never incandescent bulbs.
6. Add a Hanging Loop
- Punch a tiny hole at one star tip.
- Thread string or thin wire through and tie a loop.
4. DIY Tassel Christmas Tree Ornaments
Copy this DIY Christmas decor idea:


Materials You’ll Need
- Green yarn (any shade)
- Scissors
- Small wooden stars (or felt/paper stars)
- Small white beads, pom-poms, or pearls
- Hot glue gun or strong craft glue
- Twine/string for the garland
- Wooden beads (optional, for spacing)
- Cardboard (to wrap yarn)
Step-by-Step Instructions
1. Make the Tassel “Trees”
- Cut a piece of cardboard about 4–5 inches wide (this determines tree height).
- Wrap green yarn around it 30–40 times, depending on how full you want the tree.
- Slide the wrapped yarn off carefully.
- Tie a piece of yarn around the top tight—this becomes the hanging loop and forms the top of the “tree.”
- Cut the loops at the bottom to form a tassel.
- Trim the sides into a triangular Christmas-tree shape:
- Slight angle on both sides
- Keep the bottom straight
Pro Tip: Don’t worry about perfection—messy texture looks natural!
2. Fluff & Shape
- Use your fingers or a comb to gently fluff out the yarn strands.
- Trim until you get a cute tree silhouette.
3. Add Snow Decorations
- Dab tiny amounts of glue across the tree.
- Stick on small white beads or mini pom-poms.
- Scatter them randomly so they look like snow.
4. Add the Star Topper
- Glue a small wooden star to the top knot of each tree.
- Hold for 5–10 seconds until secure.
5. DIY Beaded Bow Ornaments
Copy this DIY Christmas decor idea:


Materials You’ll Need
- Beads (seed beads or any small beads): Green, gold, pearl, or any color you like
- Thin craft wire (24–26 gauge works best)
- Ribbon for hanging (sheer ribbon looks beautiful)
- Scissors or wire cutters
- Optional: Needle-nose pliers (makes bending easier)
Step-by-Step Instructions
1. Prepare the Wire
- Cut a piece of wire about 10–12 inches long.
- Longer = easier to shape, you can trim later.
2. String the Beads
- Thread beads onto the wire until you have 8–12 inches of beaded length, depending on how large you want your bow.
- Leave about 1–1.5 inches of wire un-beaded at both ends.
Pro Tip: Keep the beads loosely packed so the wire can bend smoothly.
3. Form the Bow Shape
- Make the first loop
- Curve one side of the beaded wire into a loop (the bow “ear”).
- Pinch the center with your fingers.
- Create the second loop
- Form an equal-size loop on the other side.
- Pinch the center again—now it looks like a bow.
- Shape the tails
- Bend the remaining beaded wire downward to form the bow’s tails.
- Adjust lengths as desired.
4. Secure the Center
- Twist the two loose wire ends together tightly behind the bow.
- Trim any excess wire.
- If you want a polished look, wrap a tiny piece of ribbon or an extra bead around the center.
5. Add the Hanging Ribbon
- Cut a piece of ribbon about 6–8 inches long.
- Tie it around the center twist (or loop through the bow’s top).
- Make a knot or small loop for hanging.
6. DIY Faux Gingerbread Village
Copy this DIY Christmas decor idea:


Materials You’ll Need
- Plain ceramic or dollar-store village houses (white or unpainted work best)
- Brown spray paint or acrylic paint (matte “gingerbread” shade)
- White paint pen (fine or medium tip)
- Optional: matte clear sealer spray
- Evergreen sprigs or fairy lights for display
Step-by-Step Instructions
1. Paint the Houses
If your houses aren’t already brown:
- Clean them with a damp cloth.
- Spray or brush them with the gingerbread-brown paint.
- Allow to dry completely (about an hour).
- Tip: Matte finishes look the most gingerbread-like.
2. Add “Icing” Details With a Paint Pen
Use your white paint pen to draw:
- Window frames
- Dots
- Swirls
- Scalloped “icing” along the roof
- Snowflakes or hearts
- Border lines around doors and edges
Pro Tip: Go slow—short strokes look more like piped icing.
3. Seal (Optional)
- If these will sit somewhere they might get touched a lot: Spray a light coat of matte clear sealer to protect your designs.
4. Display
Arrange them with:
- Pine branches
- Faux snow
- Twinkle lights placed inside the houses
- A tray to create a cozy vignette
Bonus Ideas
- Use gold or red paint pens for accents.
- Mix house shapes for a full “village.”
- Add battery tea lights inside for a warm glow.
7. DIY Hanging Advent Calendar Garland
Copy this DIY Christmas decor idea:


Materials You’ll Need
- Brown kraft paper bags (24)
- Mini clothespins or twine/string
- Twine, yarn, or ribbon for hanging
- Number tags (you can print, handwrite, or cut from cardstock)
- Small ornaments, pompoms, or felt balls
- Faux greenery or tinsel garland
- Hot glue gun or tape
- Optional: felt letters (“OH WHAT FUN”), or you can make your own
Step-by-Step Instructions
1. Create the Hanging Base
You can choose one of two base styles:
Option A: A long twine garland
- Cut a 5–6 ft piece of thick twine or yarn.
- Attach it to the wall with small nails, removable hooks, or Command hooks.
- Let it drape slightly so it forms a soft swoop.
Option B: Layered look (like the photo)
- Hang two garlands:
- Top: tinsel or greenery
- Bottom: thick twine for the advent bags
- Let them overlap for a full, textured look.
2. Prep the Advent Bags
- Fill 24 small kraft bags with little treats, notes, or trinkets.
- Fold the tops and punch a small hole OR leave them open and tie with yarn.
- Add number tags:
- Write numbers 1–24 on cardstock
- Or print premade calendar numbers
- Or cut cute shapes like stars, ornaments, and mittens
- Attach the number tag to each bag using:
- Mini clothespins
- Twine through a punched hole
- Hot glue (for flat tags)
3. Attach Bags to the Garland
- Use twine or clothespins to clip each bag to the lower garland strand.
- Scatter the bags at different heights for a playful, uneven look.
- Mix smaller and larger tags to add dimension.
4. Add Decorative Touches
To create the cozy, whimsical style from the picture, decorate with:
- Felt balls or pom-pom garlands
- Drape them over the top garland.
- Glue a few to the bags for texture.
- Mini ornaments
- Tie ornaments between the bags.
- Add bells, stars, or tiny bottle-brush trees.
- Greenery & tinsel
- Tuck small sprigs into the garland.
- Wrap the tinsel around the twine.
5. Felt letters (“OH WHAT FUN”)
Purchase premade letters OR
- Cut your own from felt and lightly stuff them with cotton balls for that chunky look.
- String them on yarn and hang above the advent garland.
6. Step Back & Adjust
- Even out the spacing
- Add a few finishing touches
- Make sure everything hangs securely
8. DIY Pom-Pom Winter Village Wreath
Copy this DIY Christmas decor idea:


Materials You’ll Need
- Foam wreath form (any size, but 14–18″ works best)
- Yarn in cream, white, and soft taupe/gray
- Pom-pom makers or cardboard circles
- Hot glue gun + glue sticks
- Mini house (wood, ceramic, or cardboard — battery tea-light compatible)
- Mini bottle-brush trees
- Battery tea light or micro LED light
- Scissors
Step-by-Step Instructions
1. Make the Pom-Poms
- You’ll need about 30–40 pom-poms depending on wreath size.
How to make them (super easy):
Option A: Using a pom-pom maker
- Wrap yarn around the tool until very full.
- Close, cut the loops, and tie tightly in the center.
- Fluff and trim.
Option B: Using cardboard
- Cut two matching doughnut shapes from cardboard.
- Wrap the yarn thickly around both.
- Cut around the edges, insert a piece of yarn between the cardboard layers, and tie tight.
- Remove cardboard, fluff, and trim.
Make:
- 20–25 white/cream pom-poms
- 8–10 light taupe pom-poms
(mix sizes for a natural look — some small, some large)
2. Attach Pom-Poms to the Wreath Form
- Start at the top and work your way around.
- Hot glue each pom-pom tightly into place — press firmly for a few seconds.
- Alternate colors randomly so it looks organic.
- Fill every gap so the wreath looks plush and full.
Pro Tip: Slightly overlap pom-poms for a fluffy, cloud-like look.
3. Create the Mini Winter Scene
- At the bottom center of the wreath:
- Add the little house
- Place your mini house on a small piece of cardboard or wood if you want extra stability.
- Glue it lightly onto the wreath (or nestle it so it rests in the pom-poms).
- Place a battery tea light or tiny LED inside to make the windows glow.
- Add trees
- Glue 2–4 bottle-brush trees around the house.
- Angle them slightly for a “forest” look.
4. Final Touches
- Make sure any visible glue strings are removed.
- Trim pom-poms for neat shape.
- Add a ribbon loop or simply hang the wreath from the foam form.
8. DIY Twine & Rope Christmas Trees
Copy this DIY Christmas decor idea:


Materials You’ll Need
- Foam or cardboard cones (any size)
- Twine, jute rope, or cotton rope (various thicknesses if you want different looks)
- Hot glue gun + glue sticks
- Wood slices or small logs (for the bases)
- Wooden dowels or sticks
- Scissors
Optional:
- Ribbon or star topper (the photo uses a star anise!)
- Faux greenery for display
Step-by-Step Instructions
1. Prepare the Base
- Drill a small hole in the center of each wood slice (or use a hammer and nail to make a starter hole).
- Insert a wooden dowel or stick — secure with hot glue if needed.
- Set aside.
2. Create Your Tree Cone
Choose one of the two easy options:
Option A: Foam Cone
- Buy premade foam cones from the craft store — easiest.
Option B: DIY Cardboard Cone
- Roll a piece of thick cardstock/poster board into a cone shape.
- Hot glue or tape the seam.
- Trim the bottom flat.
3. Wrap the Cone
- Starting at the bottom, add a thin line of hot glue along the edge of the cone.
- Press your twine or rope down onto the glue.
- Continue wrapping upward, adding glue every few rows to keep it secure.
- When you reach the top, tuck the end under and glue it neatly.
Pro Tip: For a striped tree like one in the image, alternate between two types of twine every few rows.
4. Attach the Tree to Its Base
- Poke a hole in the bottom of the cone using scissors or a pencil.
- Slide the cone onto the dowel or stick you attached to the wood slice.
- Secure with a bit of hot glue inside the cone if needed.
5. Add Finishing Touches
- Add a tiny star topper (star anise looks perfect).
- Sprinkle fake snow or add a bow if you want a more festive look.
- Arrange greenery around the bases to match the photo.
9. DIY Pinecone Ornament with Ribbon Bow
Copy this DIY Christmas decor idea:


Materials You’ll Need
- Pinecones (real or craft store)
- Ribbon (satin or grosgrain works great)
- Twine or string for hanging
- Hot glue gun + glue sticks
- Scissors
Step-by-Step Instructions
1. Prepare Your Pinecone
- Brush off any dust or debris.
- If you picked it up outdoors, you can bake it at 200°F (95°C) for 20–30 minutes to remove moisture and bugs (optional but recommended).
2. Add the Hanging Loop
- Cut a piece of twine about 8–10 inches long.
- Tie the ends together to make a loop.
- Add a small drop of hot glue to the top of the pinecone (where the scales are tightest).
- Press the knot of the twine loop into the glue and hold until secure.
3. Make the Bow
- Cut a piece of ribbon, about 12–16 inches, depending on how big you want the bow.
- Tie it into a simple bow (like tying your shoes) and adjust the loops until it looks full and symmetrical.
- Trim the ribbon tails at an angle to prevent fraying.
4. Attach the Bow to the Pinecone
- Add a generous dot of hot glue on top of the pinecone, right where the twine loop is attached.
- Press the ribbon bow down onto the glue so it sits neatly and fans out like the one in your image.
- Hold for a few seconds until fully set.
5. Hang and Enjoy
- Your ornament is ready! Hang it on a Christmas tree, wreath, garland, or use it as a pretty gift topper.
10. DIY Gingerbread Man Garland
Copy this DIY Christmas decor idea:


Option 1: Faux Gingerbread Garland (Reusable & Easiest)
Looks just like cookies but lasts for years!
Materials You’ll Need
- Brown craft foam sheets or brown cardstock
- White paint pen or white puffy paint (for icing details)
- Gingerbread man cookie cutter (to trace)
- Scissors
- Twine or ribbon
- Hole punch OR hot glue gun
Step-by-Step Instructions
1. Trace Your Gingerbread Men
- Place your cookie cutter on the craft foam/cardstock.
- Trace 15–20 gingerbread men, depending on your window size.
2. Cut Them Out
- Cut along your traced lines.
- Clean, simple edges look best.
3. Add Icing Details
Use a white paint pen or puff paint to draw:
- Eyes
- Smile
- Buttons
- Squiggly “icing” arms/legs
Let dry completely.
4. String the Gingerbread Men
Two easy methods:
Method A: Hole Punch
- Punch a hole in each hand.
- Thread twine through, weaving in and out until the garland is the length you want.
Method B: Hot Glue
- Lay twine across the backs.
- Add a small dot of hot glue on each gingerbread man to attach the twine.
- Space evenly (about 2–3 inches apart).
5. Hang & Enjoy
Drape over windows, cabinets, across shelves, or in your kitchen just like the photo.
Option 2: REAL Gingerbread Cookie Garland
Smells amazing and looks magical.
Ingredients/Materials:
- Gingerbread dough (homemade or store-bought)
- Gingerbread man cookie cutter
- Drinking straw (for making hanging holes)
- Royal icing (optional for decorating)
- Twine or ribbon
Step-by-Step Instructions
1. Roll & Cut
- Roll dough about ¼ inch thick—thicker cookies are sturdier.
- Cut out lots of gingerbread men.
2. Create Holes Before Baking
- Use a straw to punch a hole in each hand or the top of the head.
- Twist straw slightly so the dough doesn’t close up.
3. Bake
- Bake according to your recipe.
- Let cool fully.
4. Decorate (Optional)
- Pipe icing faces and details if you want a polished look.
5. String the Cookies
- Thread twine gently through the holes.
- Space cookies evenly so the garland hangs nicely.
6. Hang in a non-humid spot
- Great for kitchens as long as it’s not too hot or steamy.
11. DIY Dehydrated Citrus Christmas Tree Ornaments
Copy this DIY Christmas decor idea:


Materials You’ll Need
Oranges, lemons, or limes (small to medium size works best)
Sharp knife or mandoline slicer
Baking sheet
Parchment paper
Oven or food dehydrator
Ribbon, twine, or string
Needle or skewer (to make holes)
Optional: cinnamon sticks, cloves, star anise for decoration
Step-by-Step Instructions
Step 1: Slice the Citrus
Wash your fruit thoroughly.
Slice into 1/4 inch thick rounds. Try to keep them even so they dry uniformly.
Remove seeds if possible to avoid brown spots.
Step 2: Dehydrate the Slices
Option A: Oven
- Preheat oven to 200°F (95°C).
- Line a baking sheet with parchment paper.
- Arrange slices in a single layer, no overlapping.
- Bake for 2–3 hours, flipping halfway through, until slices are dry but still slightly pliable.
Option B: Food Dehydrator
- Lay slices on dehydrator trays.
- Dry at 135°F (57°C) for 6–8 hours until completely dry.
Pro Tip: Keep an eye on them so they don’t burn or turn too brown.
Step 3: Add Hanging Hole
Once cooled, use a needle, skewer, or toothpick to poke a hole at the top of each slice.
Step 4: Decorate and String
Thread ribbon, twine, or string through the hole for hanging.
Optional: Attach a small cinnamon stick, clove, or star anise on top with a dab of glue or tie it with the string for extra fragrance.
Step 5: Display
Hang on your tree, garland, or even make a citrus-scented wreath.
Extra Tips:
Citrus slices will naturally darken over time. You can lightly brush them with clear varnish or mod podge to preserve the color.
Mix citrus with dried apples, star anise, or pinecones for a rustic, festive look.
Make a batch in advance; they last months if stored in a dry, cool place.
12. DIY Salt Dough Ornaments
Copy this DIY Christmas decor idea:


Ingredients & Materials
- 2 cups all-purpose flour
- 1 cup salt
- 1 cup warm water
- Rolling pin
- Cookie cutters (stars, trees, hearts, etc.)
- Straw or skewer (to poke the hanging hole)
- Baking sheet + parchment paper
- Twine or ribbon
Optional:
- White acrylic paint
- Mod Podge or clear sealant
- Glitter, beads, stamps, greenery imprints
Step-by-Step Instructions
1. Make the Dough
- Mix 2 cups flour + 1 cup salt in a bowl.
- Slowly add 1 cup warm water, stirring as you go.
- Knead for 3–5 minutes until smooth and dough-like—not sticky.
- If sticky: add a little more flour.
- If dry: add a tiny splash of water.
2. Roll It Out
- Sprinkle a little flour on your counter.
- Roll the dough to ¼ inch thick.
- Too thin = fragile
- Too thick = long drying time
3. Cut Out Shapes
- Use cookie cutters to punch out ornaments.
- Gently lift them onto a parchment-lined baking sheet.
Pro Tip: For a handmade feel, use:
- Stamps
- Lace pressed into dough
- Evergreen sprigs
- A child’s handprint
- Buttons to make patterns
4. Make the Hanging Hole
- Use a straw, skewer, or pen cap to poke a small hole near the top.
- Make sure it goes all the way through!
5. Bake or Air-Dry
Option 1: Bake
- Bake at 200°F (93°C) for 2–3 hours
- Flip halfway through for even drying
(They shouldn’t brown—low heat keeps them white.)
Option 2: Air-Dry
- Let dry 24–48 hours, flipping after the first day
(This avoids any chance of browning.)
6. Cool Completely
- Once dry, let them cool on a rack.
7. Decorate (Optional but Fun!)
- Salt dough ornaments are beautiful plain, but you can decorate them:
- Paint white for a crisp Scandinavian look
- Add metallic details (gold dots, silver stars)
- Glue on tiny beads
- Add glitter edges
- Use Mod Podge for a clear, polished finish
- Seal with Mod Podge or clear acrylic spray to make them last longer.
8. Add String
- Thread twine, jute, velvet ribbon, or baker’s twine through the hole and tie a knot.
- Your handmade ornaments are ready!
13. DIY Paper Christmas Garland
Copy this DIY Christmas decor idea:

Materials You’ll Need
- Paper (cardstock, scrapbook paper, or even old books)
- Scissors
- Pencil
- Hole punch or needle
- Twine, ribbon, or string
Optional:
- Glue stick
- Glitter
- Mini wooden beads
- Double-sided tape
- Templates (trees, stars, circles, gingerbread men, snowflakes)
Step-by-Step Instructions
1. Choose Your Shapes
- Pick simple Christmas shapes to keep it easy:
- Stars
- Christmas trees
- Circles (ornaments)
- Hearts
- Snowflakes
- Gingerbread people
Pro Tip: You can draw your own or print a template to trace.
2. Cut Out Your Shapes
- Fold your paper to cut 2–4 at once for quicker assembly.
- Use scissors to cut clean edges.
- Make 10–20 pieces depending on the length you want.
3. Double Up (Optional but recommended!)
- To make the garland feel sturdier and more polished:
- Glue two shapes together back-to-back
- Or glue 2–3 identical shapes together in a “3D fan” style for depth
- This also hides any pencil marks.
4. Add Holes or Tabs
Choose ONE of these methods:
Method A: Hole Punch
- Punch a hole at the top of each shape and thread your string through.
Method B: Tape to String
- Use double-sided tape or glue to attach the string to the back of each piece.
Method C: Sew Through
- Use a needle to poke through each shape and “sew” them along the string for a minimalist look.
5. String the Garland
- Slide shapes along the twine
- Space them evenly (2–4 inches apart is ideal)
- Add knots or tiny beads between shapes if you want a more finished look
6. Add Decorations (Optional)
Make it festive with:
- Glitter edges
- Stickers
- Stamped patterns
- Hand-drawn details
- Small pom-poms
- Tiny bows or faux greenery
Or keep it simple and minimal—paper alone can look stunning!
7. Hang Your Garland
Great places to display:
- Across your mantel
- On a Christmas tree
- Over windows
- Along stair railings
- Across shelving
- As a backdrop for photos
This post was all about the best DIY Christmas decor ideas that will make your home feel like a winter wonderland.
Other Posts You May Like:

49 Next-Level Advent Calendar Ideas That Will Make December Actually Magical

50 Actually Good White Elephant Gifts Under $50 Everyone Will Want to Steal
